Easiest way to Use Custom Fonts on your Smartphones: No Root
Default fonts on Android phones are great but most smartphone users would prefer to use their own customized font. The amazing thing about Android is the flexibility.
See Also: Easy way to Root Android Phones running on Oreo 8.0/8.1
The font is extremely customizable, It even allows you to change the fonts on its user interface. This tutorial will show you how to change to different fonts on your Smartphones.
How To Customize and Apply Different Fonts On Android Phones
Before we start, I would like to bring to your notice that many launchers come with their own customizable fonts like Apex launcher and Go launcher. Likewise there are many Apps to customize the font style as well.
In this tutorial, we will be using iFont App because it works on Xiaomi, Meizu, Huawei, some samsung and Tecno Phones.
The sweetest thing about this tutorial which actually made me post it is that you don’t have to root your smartphone.
STEP2: Open the iFont App, and download any font style, you prefer
STEP 3: Now Locate and Open File Manager On Your Phone.
See Also: List Of Top 13 Common Android Smartphones Problems and Solutions
STEP 4: Navigate to the iFont folder and click on cache folder, you will see the font style you downloaded. As shown below
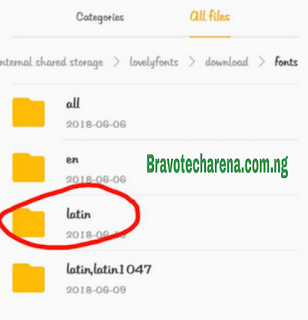
STEP 5: Now Move the style you downloaded earlier to lovelyfont folder. (if you can’t see lovely font folder, open Hi theme => Discovery => Font => then download any font, to bring out the lovely fonts folder on your file manager.)
STEP 6: Once the Lovelyfont folder has appeared, Open lovely fonts folder and locate latin and Paste the moved iFont => Cache => Downloaded font style folder in Latin Folder.
STEP 7: Navigate to Phone Settings => Themes and Lock screen, select my fonts and choose your desired font style. In some case you need to Navigate to Settings => Display => Font => Font style to apply the new font.


